Goal: decide how you appear: by one or more @handles, with or without your real name.
Before you start: your username is your primary handle. Your real name is private unless you choose to show it.
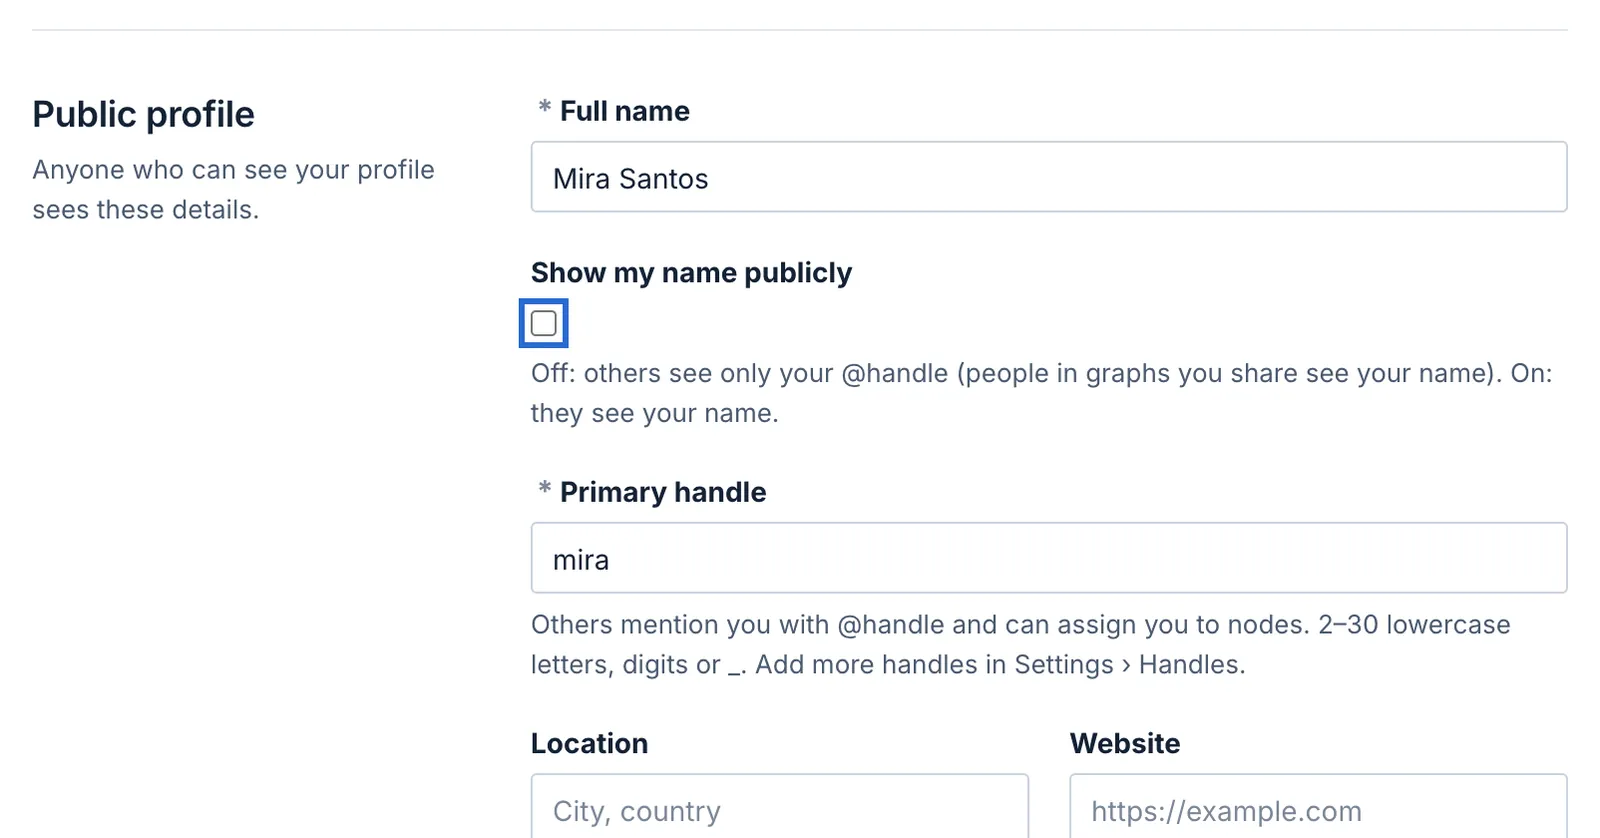
Open My profile › Edit profile (or Settings). Under Public profile, Show my name publicly is off by default: others see only your @handle, while people in graphs you share see your name.
Public profile settings: full name, Show my name publicly, primary handle
Go to Settings › Handles. Under Add a handle, type a new one (2–30 lowercase letters, digits or _, starting with a letter) and click Add. You can have up to five.
Settings › Handles: the primary handle, Show reputation, and Add a handle
Show reputation chooses whether a handle's page (/@handle) shows its counts: merged contributions and decisions. Reputation per handle is otherwise In development.
Once you have more than one handle, comment boxes, Talk and proposals show an As picker: choose the handle to act under. When you act on a node you own, Knowen uses the handle that owns it.
What happens next. Each action keeps the handle it was done under. A handle other than your primary one links only to its own page, which never shows your other handles, name or email.
Undo.Remove a handle you no longer want; someone else may then take it. What was done under it keeps its name.
**Goal:** decide how you appear: by one or more @handles, with or without your real name.
**Before you start:** your username is your primary handle. Your real name is private unless you choose to show it.
1. Open **My profile › Edit profile** (or **Settings**). Under **Public profile**, **Show my name publicly** is off by default: others see only your @handle, while people in graphs you share see your name.
2. Go to **Settings › Handles**. Under **Add a handle**, type a new one (2–30 lowercase letters, digits or _, starting with a letter) and click **Add**. You can have up to five.
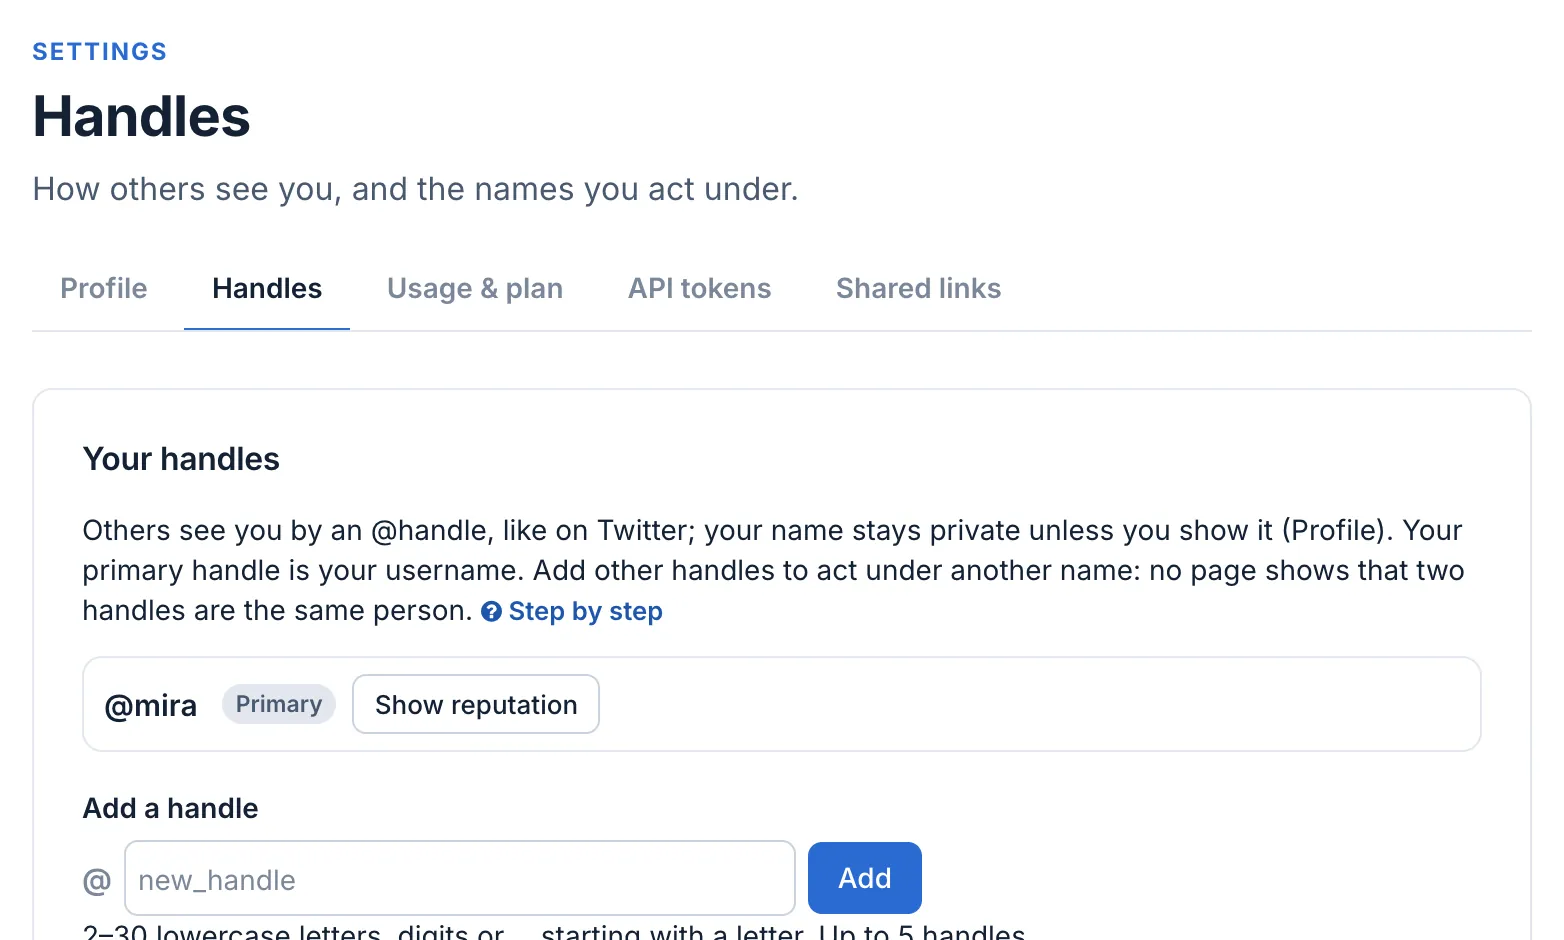
3. **Show reputation** chooses whether a handle's page (`/@handle`) shows its counts: merged contributions and decisions. Reputation per handle is otherwise **In development**.
4. Once you have more than one handle, comment boxes, Talk and proposals show an **As** picker: choose the handle to act under. When you act on a node you own, Knowen uses the handle that owns it.
**What happens next.** Each action keeps the handle it was done under. A handle other than your primary one links only to its own page, which never shows your other handles, name or email.
**Undo.** **Remove** a handle you no longer want; someone else may then take it. What was done under it keeps its name.